You are here: Miscellaneous
> Modify Users - Bulk
Introduction
Services
Implementation
Miscellaneous
Modify Users - Bulk
Close
If many users are to be modified in a domain (say their passwords changed or forwarding set), modifying using the Web GUI may be time consuming and inefficient. In that case, Administrators can upload a spreadsheet containing the required data and modify the users. Follow these steps to modify users in bulk.
|
Sl No |
Description |
|
1 |
Create a spreadsheet in your favorite office suite. |
|
2 |
Enter data for one user in a single row. |
|
3 |
For each row, the columns should have the following data. There should be no header row. The first row should contain data of first user. Second row, data of second user and so on... |
|
4 |
Column 1: username Contains the email address of the user. Required. |
|
5 |
Column 2: name Contains name of user. Recommended |
|
6 |
Column 3: password Contains password of user. Optional. Password is required only for Email Storage Service and Non-Email services. If you have passwords in another system and want to migrate the same to HamaraCloud, same can be done. For migration, you can take the Password hash from the old system and give in password field. HamaraCloud supports
|
|
7 |
Column 4: alias Specify email address this is an alias of. Optional. Has effect only if Domain has Email Storage Service. |
|
8 |
Column 5: fwdemail Specify the email addresses to which incoming email for this mail box should be forwarded to. Multiple email addresses should be separated by , (comma). Optional. Has effect only if Domain has Email Storage Service. fwdemail and alias cannot both be specified for same user. |
|
9 |
Column 6: internal If this is an internal email address, specify 1, if not specify 0. Optional. |
|
10 |
Column 7: recipientbcc Specify the email address all incoming emails of the user has to be Bcc'ed to. Optional. |
|
11 |
Column 8: senderbcc Specify the email address all outgoing emails of the user has to be Bcc'ed to. Optional. |
|
12 |
Column 9: uploadnotifyemail Specify the email address to be notified if this user uploads any document using FTP/Web. Optional |
|
13 |
Save the Spreadsheet in Excel 97-2003 Workbook (*.xls) format. |
|
13 |
Make sure that the spreadsheet does not contain more than 1000 rows. If you need to create more than 1000 users, create multiple spreadsheets of 1000 users each. |
|
14 |
Once you are ready with the spreadsheet, proceed further |
|
15 |
Login to control panel |
|
16 |
That will bring up the following window  |
|
17 |
Click on Bulk Operations. That will bring up the following window 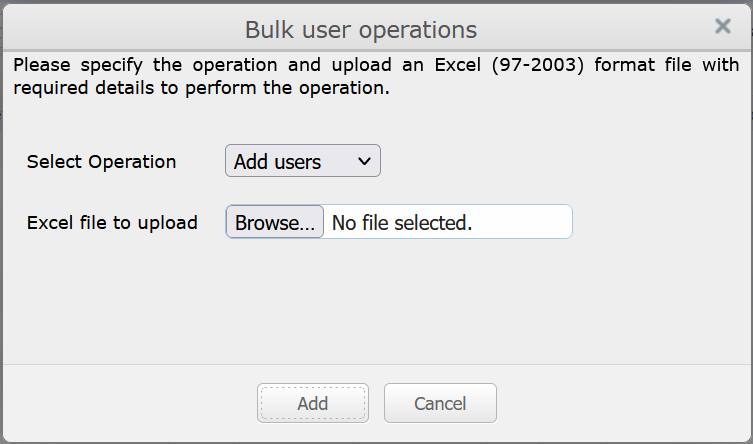 |
|
18 |
Choose Select Operation field as Modify users. That will display the following 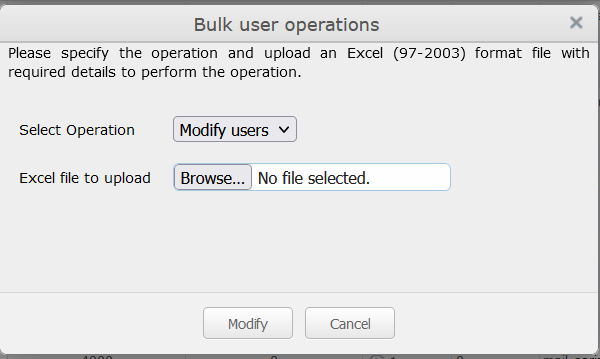 |
|
19 |
Click on Browse... button. Select the spreadsheet you have created. Click on Modify button |
|
20 |
The bulk modification job will be added to queue and following is displayed. 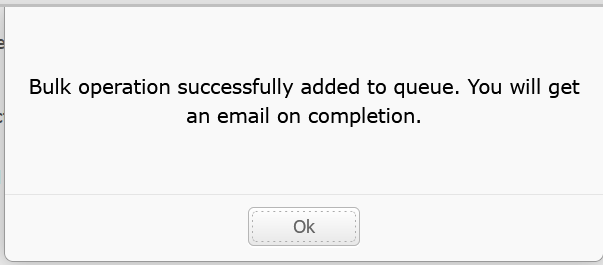 |
|
21 |
Click on OK. Old window will be displayed. Click on Cancel to close the Window. |
|
22 |
This operation will be completed in about an hour and on completion, you will get an email containing status of the operation. |
   |